
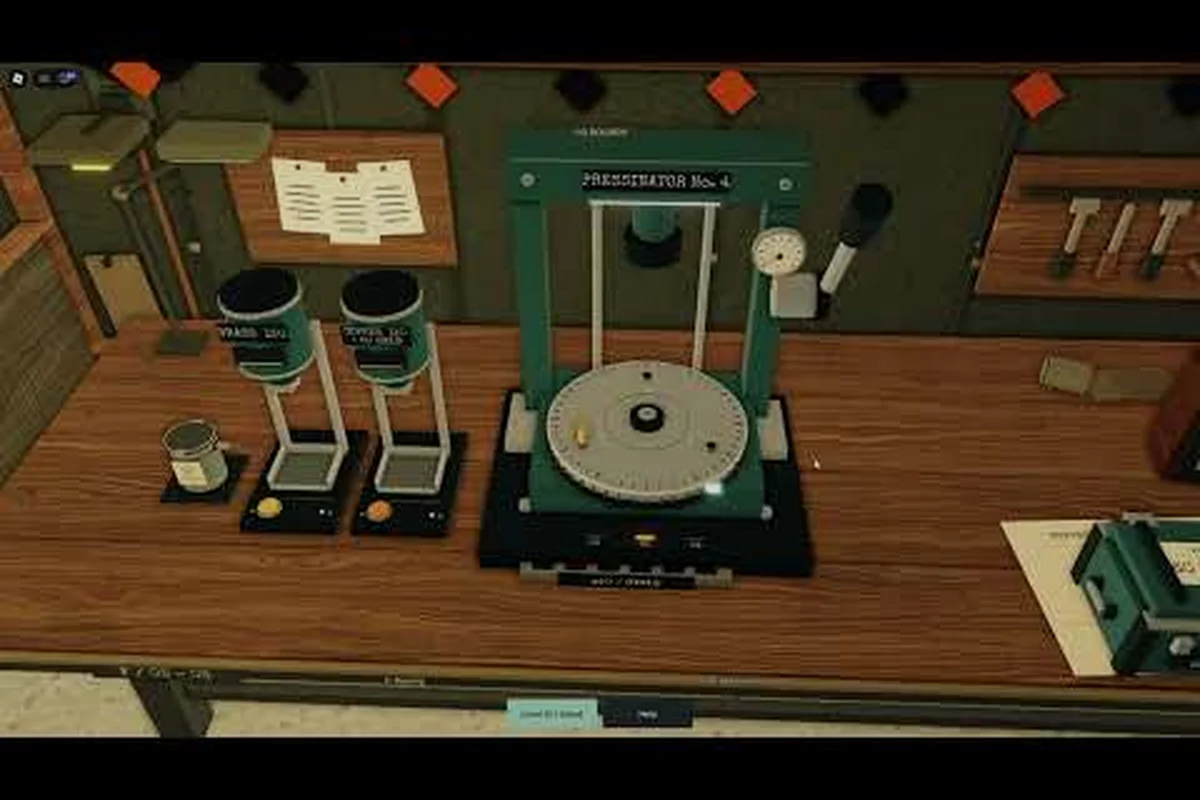
The BRASS HELL crate system is the spine of the entire factory: orders tell you what to build, crates turn loose rounds into sellable stock, and deliveries convert that stock into the money that upgrades your workshop. Miss any link in that chain and your production line stalls, no matter how fast you can run the press.
This breakdown walks through each stage of the BRASS HELL crate loop in order — order intake, press throughput, crate assembly, and delivery payout — flagging the exact numbers and timing that matter at each handoff. The goal is cause and effect rather than guesswork: you'll see why a press running flat out can still leave crates half-filled when the order queue outpaces your brass feed, and why a delivery dispatched a few seconds late can miss a payout window and drag your per-minute earnings down. With those choke points mapped, you can stop guessing why your earnings plateau and start pushing toward the next workshop tier with a clear target for which system to upgrade first.
How the BRASS HELL Game Loop Explained Fits Together
Every session follows the same four-beat rhythm, and understanding it is the fastest way to stop wasting materials. The official page describes the order system as the heartbeat of the loop, and that framing is accurate: nothing else in the factory moves until an order exists to give your production a target.
Here is the sequence in plain terms: the loop runs order intake → press work → crate filling → delivery, and each beat maps to a distinct workshop system rather than a single blurred action. In practice, a typical early order might ask for a batch of pistol rounds, which you press one cartridge at a time before the crate counter advances toward the target; only when the crate is sealed and delivered does the payout convert into upgrade currency. Because the crate system ties the press output directly to the delivery payout, any round left unpressed is effectively unpaid labour — which is why the order quantity, not your stockpile, dictates how long each cycle lasts.
-
Order intake — a new request arrives specifying an ammunition type and a quantity.
-
Press work — you manually operate the press, round by round, to produce the required ammunition.
-
Crate filling — finished rounds go into a crate until it hits the requested count.
-
Delivery — the sealed crate leaves the factory and pays out currency for upgrades.
The critical detail is that hands-on crafting is the core differentiator here. Unlike idle-style incrementals where production ticks along while you are away, the press must be operated by the player each round. That keeps the loop active rather than passive, and it means your real bottleneck is usually attention, not raw materials.
Why the Loop Feels Different From Idle Games
In a typical incremental sim, you buy a machine and it produces forever. In BRASS HELL, the press is a physical station you interact with, so every crate represents actual clicks and timing. Community gameplay footage from creators like Tryhard_PlayzGames channel shows players hand-building large quantities of rounds, which matches the game's manual-crafting pitch.
That design choice has a knock-on effect on how you should plan a session. Because you cannot walk away and let the press run, the smart play is to batch your work: fill one crate completely, deliver it, then start the next order rather than hopping between tasks.
The Three Stations That Matter
The factory floor is organized around three functional areas, and each one maps to a stage of the loop: the order board at the front of the shop, the manual press at the bench, and the crate and shipping area by the loading door. Keeping these stations physically separate matters because the BRASS HELL crate system punishes backtracking — every trip between the press and the shipping area is time you are not crafting rounds, and a full crate left on the sealing table stalls the entire delivery cycle.
| Station | Function | What It Gates |
|---|---|---|
| Order board | Displays incoming ammunition requests | Which ammo type you produce next |
| Press | Manual round-by-round crafting | Production speed and output quality |
| Crate and shipping area | Seals filled crates and sends them out | Your actual income per cycle |
Treat these as a pipeline rather than three separate chores, because the BRASS HELL crate system only pays out when a request moves from board to press to sealed crate without stalling. A crate that sits filled but undelivered is dead capital: the rounds inside it are already crafted and paid for in press time, yet they earn nothing until the shipping area seals and sends them out. Likewise, an order you accept but never complete blocks the board from refreshing with something you could actually finish — so clear the oldest request first, press only the ammo type it names, and walk the finished crate straight to the loading door before starting the next batch.
BRASS HELL Press Mechanics and Crate Filling
The press is where the BRASS HELL press mechanics either make or break your session. Each round is produced through a manual interaction, and the game expects you to keep feeding that interaction until the crate's requirement is met. There is no auto-fill toggle at the early workshop tiers, so your throughput is directly tied to how efficiently you work the station.
A few practical observations from the loop: the press interaction has a short cooldown between rounds, so chaining inputs without pause beats mashing — a steady rhythm finishes a standard crate noticeably faster than erratic clicking. Watch the crate counter rather than the animation; the fill registers the moment the round drops, and stopping early leaves you with an unfilled crate that still occupies workshop floor space. Keep your brass stock topped up before accepting a new order, because running dry mid-crate forces a supply run that stalls the whole BRASS HELL delivery system while the requirement sits half-met.
-
Ammunition type changes the workload. Different orders request different rounds, and switching types mid-crate wastes setup time.
-
Crate requirements are fixed once accepted. You cannot partially deliver and bank the difference, so finish what you start.
-
Filled crates are stock, not money. The value only converts when the shipment goes out.
That last point trips up a lot of new players. The game tracks filled crates as inventory sitting in your factory, and that inventory is worth nothing until it ships. If you are staring at a full crate wondering why your balance has not moved, the answer is almost always that you have not triggered the delivery step.
Reading an Order Before You Accept It
Not every order is worth taking the moment it appears. Before you commit, check three things: the ammunition type, the quantity, and whether your current workshop tier can produce that type efficiently. An order that demands a round your press handles slowly will eat your whole session for a modest payout.
The official Roblox game page frames orders as demanding pack, fill, and deliver actions in sequence, and fulfilling them banks the earnings that fund workshop upgrades. That sequence is the contract — accept an order and you have signed up for all three phases.
Crate Filling Step by Step
Here is the cleanest way to run a crate from empty to shipped: treat the crate itself as the unit of work, not the individual round. In BRASS HELL the press keeps producing whether or not you are watching it, so every second a finished round sits outside the crate is wasted throughput — and every unsealed crate is stock that cannot be delivered or counted toward your payout. Working crate-first keeps the press, the crate, and the delivery board in sync: confirm the order, set the press, deposit as you produce, seal on the exact count, then ship before touching the next order.
-
Confirm the order type on the board and note the exact quantity required.
-
Set the press to that ammunition type before producing a single round.
-
Produce in batches and deposit into the crate as you go, rather than letting finished rounds pile up outside it.
-
Seal the crate the moment the count is met — a sealed crate is stock you can ship.
-
Deliver immediately so the payout lands before you accept the next order.
Skipping step five is the single most common self-inflicted slowdown in the early game. Players fill three or four crates, then wonder why their upgrade budget is stuck. The trap is that a filled-but-unsealed crate still counts as zero deliverable stock on the delivery board, so the payout that should fund your next press upgrade or ammunition unlock never lands — and because the press keeps running, those idle crates quietly compete with fresh orders for your attention. Seal and ship each crate the instant its count is met, then accept the next order; chaining deliveries back-to-back is what actually compounds your BRASS HELL crate system income instead of letting finished stock rot in the workshop.
BRASS HELL Delivery System Guide: Turning Stock Into Upgrades
The delivery step is where the BRASS HELL delivery system guide earns its keep, because this is the moment your factory actually gets paid. Shipments close the production cycle: finished crates are delivered out of the factory to convert stock into upgrade currency. Everything before this point is preparation.
What the payout funds matters just as much as the payout itself. Earnings go into workshop upgrades, and those upgrades are what let you handle bigger orders, faster press work, and eventually more valuable ammunition types. The loop is deliberately circular — deliver to upgrade, upgrade to deliver more.
Where the Money Actually Goes
Spending decisions shape your next hour of play more than any single press run, because every credit sunk into the wrong track stalls the whole BRASS HELL crate system loop. A rough priority order that works well through the early tiers: press speed or handling first (it multiplies crates per session), then order capacity or value once your first speed upgrade lands, then crate or storage capacity when you begin filling multiple crates at once, and cosmetic or side systems dead last — they contribute nothing to throughput until the core loop is stable.
| Upgrade Priority | Why It Comes First | When to Buy |
|---|---|---|
| Press speed or handling | Directly increases crates per session | As soon as it is affordable |
| Order capacity or value | Raises the payout ceiling per delivery | After first speed upgrade |
| Crate or storage capacity | Lets you batch work without blocking | When you start filling multiple crates |
| Cosmetic or side systems | No effect on throughput | Last, once the loop is stable |
The reasoning is simple: press improvements compound across every future crate, while a one-time payout boost only helps once. If you want a deeper look at how each tier is priced, the workshop upgrade cost list breaks down the progression curve.
Why Deliveries Beat Hoarding
Some players instinctively hoard filled crates, assuming prices or demand will improve. In practice, holding stock does nothing for you — the crate does not appreciate, and the upgrade you are delaying is exactly the thing that would let you produce faster. Deliver early, deliver often, and let the currency work.
The same logic applies to accepting orders you cannot finish. An unfulfilled order occupies the board and your attention without generating income, which is strictly worse than a smaller order you complete and ship. Under the BRASS HELL crate system, every active order slot is a production commitment: if your press throughput and workshop upgrade tier cannot realistically cover the crate count before the delivery window closes, you are locking a slot that a shippable order could have used. A completed small crate pays out and frees the slot for the next cycle, while a stalled large order blocks that rotation entirely and delays the very upgrade currency you need to raise output.
BRASS HELL Workshop Systems and Upgrade Timing
The BRASS HELL workshop systems are the long-term progression layer wrapped around the crate loop. Each upgrade tier changes what the loop looks like: early tiers are about making the press bearable, mid tiers are about handling larger orders, and later tiers are about multiplying the value of each shipment.
A useful way to think about it is that the workshop is your multiplier and the crate system is your base rate. Upgrading the multiplier without feeding it crates is pointless, and grinding crates without upgrading means you stay stuck at the same output forever. The two have to move together.
Signs You Have Outgrown Your Current Tier
Watch for these signals that it is time to spend rather than grind: your press cycle time no longer matches the crate sizes the order board is asking for, your scrap balance keeps hitting the cap because nothing in the current workshop tier is worth buying, or you find yourself running the same low-value delivery loop just to keep the press busy. Each of these points to a bottleneck in the BRASS HELL crate system rather than a shortage of raw materials — the fix is almost always an upgrade purchase, not more grinding.
-
Crates take noticeably longer than they used to because order quantities have scaled up.
-
You are declining orders regularly because your press cannot keep pace.
-
Your balance sits idle between sessions because there is nothing worth buying yet — a sign you need to push to the next tier.
If you recognize two or more of these, stop producing for a moment and check what the workshop offers. The game mechanics overview covers how orders and shipments interact with the upgrade tree in more detail.
Balancing Production and Spending
The cleanest rhythm is a repeating three-session cycle: produce and deliver until you can afford an upgrade, buy the upgrade, then immediately test it on a fresh order to feel the difference. That test run tells you whether the upgrade was worth it and informs your next purchase.
Players who report smooth progression tend to follow this pattern rather than saving for large jumps. A modest upgrade bought early generates more total income than a big upgrade bought late, because the early one has more crates to multiply.
Common Crate System Mistakes and How to Avoid Them
Most stalled factories trace back to a handful of repeatable errors rather than bad luck — and nearly all of them sit inside the BRASS HELL crate system loop rather than the combat layer. The table below maps each mistake to its symptom and the fix, from filling crates without delivering (which leaves you with high stock and a low balance) to switching ammo types mid-crate and burning setup time you already paid for. Treat it as a diagnostic checklist: match the symptom you're seeing in your workshop, then apply the corresponding fix before your next seal.
| Mistake | Symptom | Fix |
|---|---|---|
| Filling crates without delivering | High stock, low balance | Deliver after every seal |
| Switching ammo types mid-crate | Wasted setup time, slow crates | Finish the current crate first |
| Accepting orders above tier | Board blocked, no income | Decline and take a smaller order |
| Saving for one big upgrade | Slow early progression | Buy incremental upgrades as affordable |
| Ignoring press upgrades | Crates take forever | Prioritize handling speed first |
Each of these is easy to correct once you know to look for it. The delivery mistake is the most expensive, because it silently converts hours of work into inventory that never pays out: a sealed crate sitting undelivered still counts against your stock while contributing nothing to your balance, so every subsequent fill competes for capacity you've already spent. In practice this compounds — you keep feeding the press, keep sealing BRASS HELL crates, and the payout counter stays flat, which reads as slow progression when the real cause is an uncollected delivery. Build the habit of delivering immediately after each seal, before you touch the press again, so the crate system loop closes every cycle.
A Quick Sanity Check Routine
Before ending a session, run this check: is every filled crate delivered, is the order board clear of anything you cannot finish, and is your balance either spent or earmarked for a specific upgrade? If all three answers are yes, you are leaving nothing on the table.
That routine takes under a minute and prevents the most common form of wasted progress. For a broader look at how the whole simulation fits together, the gameplay overview puts the crate loop in context with the rest of the factory.
Frequently Asked Questions
What does the BRASS HELL crate system actually do?
It converts your manual press work into income. Orders specify an ammunition type and quantity, you fill a crate to that count, and delivering the sealed crate pays out currency. That currency then funds workshop upgrades, which let you handle larger orders and faster production in the next cycle.
Why is my balance not increasing even though my crates are full?
Filled crates count as stock sitting in your factory, not as money. The payout only triggers when you deliver the crate out of the factory. Seal the crate, then run the delivery step immediately so the earnings land before you accept another order.
Do I need to operate the press manually every time?
Yes, at least through the early workshop tiers. The game is built around hands-on crafting rather than idle automation, so each round requires player interaction. Press-related upgrades reduce the friction, but the loop stays active rather than passive by design.
Which upgrade should I buy first in the workshop?
Press handling speed is the strongest first purchase because it compounds across every future crate you fill. Order value and crate capacity come next, once your production pace feels comfortable. Cosmetic and side systems can wait until the core loop is running smoothly.
How many crates should I fill before delivering?
One at a time is the safest rhythm. Filling several crates before shipping ties up your earnings in inventory and delays the upgrade that would speed up your next batch. Deliver each crate as soon as it seals, then start fresh.
The crate system rewards players who treat it as a tight, repeating cycle rather than a series of separate chores. Keep orders matched to your tier, seal and ship every crate promptly, and spend your earnings on press improvements that make the next cycle faster — that discipline is what separates a factory that grows from one that idles.