
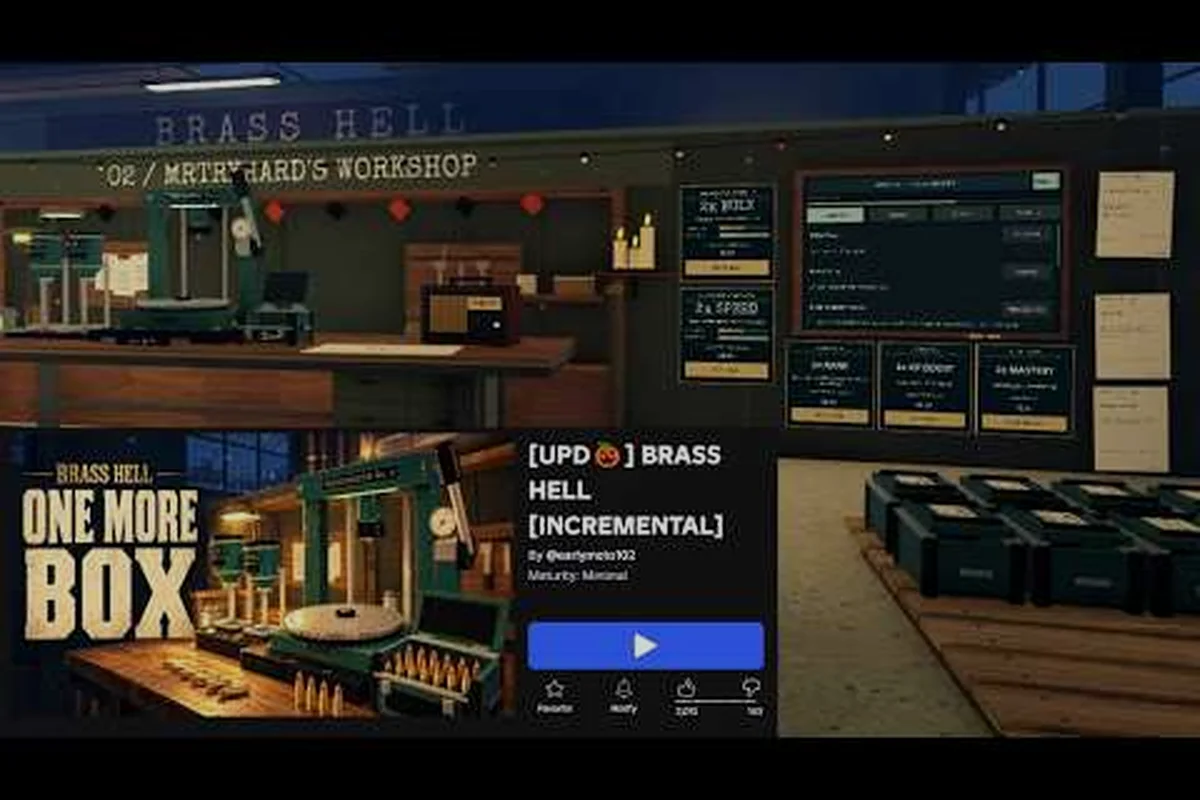
Survival in BRASS HELL depends on keeping the press active, managing loose rounds, and completing orders without creating avoidable bottlenecks. Treat ammunition as a production constraint rather than an unlimited resource: if loose Brass rounds begin crowding the work area, every extra pickup interrupts the rhythm of the press and can delay a higher-priority order. Watch the order queue for urgent jobs, move completed tasks first, and use short, repeatable routines so the line keeps running instead of leaving cartridges, machines, or workstations idle. Timing these routines is what turns a reactive shift into a controlled one.
BRASS HELL Survival Guide: Core Systems and First Priorities
A reliable BRASS HELL survival guide starts with understanding that the press is not an isolated machine. It sits inside a connected production line where rounds, crates, orders, and player movement all compete for attention. The strongest approach is to keep the line moving in small, repeatable steps rather than waiting for a large order to become urgent.
The production loop
At its simplest, the loop is: collect or prepare ammunition, feed the press, handle the resulting output, and deliver the required quantity for the current order. A player can become overwhelmed by treating every object as equally urgent, so the useful skill is identifying which task will stop the chain soonest.
| Production element | Immediate function | Common mistake | Survival response |
|---|---|---|---|
| Press | Converts incoming material into usable output | Waiting for a perfect moment | Keep it active whenever the line is safe |
| Loose rounds | Provide immediate ammunition or order value | Leaving them scattered | Collect during nearby movement routes |
| Crates | Group materials and support order handling | Opening them at the wrong moment | Process when the press queue is clear |
| Orders | Define the objective and delivery target | Accepting too many tasks | Prioritize nearby, compatible, and quick completions |
| Movement route | Connects stations and reduces travel time | Crossing the map repeatedly | Plan a short loop between nearby stations |
The important detail is that press uptime is the central priority. Every second spent searching far away while the press is idle can create a larger delay than the travel itself. New players should learn the shortest route that keeps the press supplied, then expand their route only when the production line is stable.
Start with a short route
A practical opening routine is: begin beside the press, identify its current order, and complete that cycle before searching elsewhere. For example, if the press is chewing through an easy brass order while a crate waits nearby, clear the finished output first so the machine does not stall. Keep the press queue supplied, grab nearby loose rounds, then use the surrounding work area to build a small production buffer before committing to a more distant target.
-
Check the press and clear any completed output.
-
Refill it with the closest available material.
-
Pick up loose rounds while moving around the press area.
-
Process a crate if one is nearby and no urgent order needs attention.
-
Complete the easiest available order before expanding your search radius.
This routine keeps the machine productive and prevents the player from getting stuck in one corner of the map. The BRASS HELL beginner guide can help with the basic interface and first actions, but the survival principle is simple: stay close to the production chain until you understand where delays begin.
Press Timing and Order Priority in the BRASS HELL Survival Guide
Timing is the difference between an orderly line and a constant emergency. The press should operate continuously when supplies are available, but the player must also watch for the moments when a new order changes what matters. A full inventory of the wrong item is not efficient, and an active press with no nearby crate is only useful if you can feed it quickly.
Keep the press moving
The best press timing is not based on waiting for a special animation. Instead, observe the machine’s state and act during the short windows when it is ready for the next input. If the press has a brief reset, repair, or completion interval, use that time to collect rounds, move a crate, or check the order board.
| Situation | Preferred action | Why it works |
|---|---|---|
| Press ready and material nearby | Feed it immediately | Prevents an avoidable idle period |
| Press processing and rounds visible | Collect the rounds during the wait | Converts waiting time into productive movement |
| Press ready but no material nearby | Fetch the closest crate | Keeps the line supplied |
| Press processing and several orders visible | Select the easiest compatible order | Reduces interruptions and travel |
| Press ready during a crowded moment | Finish the current safe action first | Prevents accidental line shutdown |
Short collection cycles are more valuable than long, dramatic trips. During the early part of a shift, a player should favor nearby materials and straightforward deliveries. Once the route is stable, collecting farther items can make sense because the travel cost is no longer threatening the press cycle.
Rank orders by bottleneck risk
Not every order deserves equal attention. In this BRASS HELL survival guide, an order should be ranked by how quickly it can be completed and how much attention it requires. A nearby order requiring one or two items is usually better than a distant order that demands many resources, even if the distant order offers a larger apparent reward.
Use a simple three-part test to rank each order: travel time, required items, and interruption cost. For example, if two orders offer nearly the same reward, favor the one that can be completed with one nearby pickup and one short delivery run rather than a longer route with several rare materials. This keeps the press running, reduces the risk of leaving a high-value order unfinished, and gives new players a practical way to compare BRASS HELL orders without relying only on the reward number.
-
Distance: Can I reach the required material and destination without leaving the press unattended for long?
-
Compatibility: Do I already have most of the needed items, or can the same route gather them?
-
Interruption cost: Will completing this order pull me away from active production more than another option?
When two orders have nearly identical reward value, choose the route with fewer required stops: one pickup and one delivery usually beats two pickups or a multi-leg delivery. For example, if both orders need the same material, completing the closer delivery first can finish the order sooner, reduce the chance of missing its deadline, and keep production at the press running with less idle time.
Do not overcommit
Accepting every visible order can feel productive, but each active commitment divides attention. The safest approach for new players is to keep a small personal limit and finish or drop unnecessary work before adding another. This BRASS HELL everything guide principle applies to both solo play and coordinated sessions: unfinished orders create more pressure than a deliberate short queue.
Managing Loose Rounds, Crates, and Bottlenecks
Loose rounds and crates are easy to overlook until they become the reason the production line stalls. Loose rounds are valuable because they can be gathered while moving, whereas crates require a deliberate stop. Treating both as instant pickup tasks is a mistake, because your route should prioritize what is nearby and what the current order needs.
Loose-round collection rule
The most efficient loose-round pattern is to collect them during unavoidable waiting periods. The press is already occupied, so a nearby round does not require a meaningful detour. A round that sits across the map can wait until the line is secure.
| Round location | Timing | Risk level | Better approach |
|---|---|---|---|
| Beside the press | During the press cycle | Low | Collect immediately while the machine works |
| Along the main route | While fetching crates | Low | Pick up during the trip |
| Near an order area | Before delivery | Low | Collect while approaching the destination |
| Far from production | When the line is stable | Medium | Defer until no nearby work remains |
Route-based collection keeps loose rounds from becoming clutter. Sweep the same short path repeatedly instead of crossing the map randomly. This habit is especially useful in a BRASS HELL roblox guide because the strongest improvement often comes from reducing wasted movement rather than performing more frantic actions.
Crate handling
Crates should be processed when they can keep the press supplied, not whenever one happens to be visible. Before opening or moving a crate, check the next press cycle. If the press is nearly ready and the crate is not close, securing that supply may be the best use of the next few seconds.
A good crate decision follows this sequence: first compare the crate’s distance with the press’s immediate ammunition needs, then choose the refill that keeps the production line supplied without forcing a long detour. If a nearby crate contains brass for the current order, process it during the next safe window; if it holds unnecessary stock, delay opening it unless movement is already required. This prioritizes high-value rounds and preserves the shortest practical route between crates and the press.
-
Confirm the press has enough material for its next cycle.
-
Walk to the nearest relevant crate.
-
Gather loose rounds on the path.
-
Process the crate only when the press can receive its contents without a long delay.
-
Return by the shortest practical route.
| Crate state | Best response | Survival benefit |
|---|---|---|
| Near the press | Process during a safe window | Creates a short supply buffer |
| Along the route | Use as the next refill | Prevents a long emergency trip |
| Beside a needed order | Open and allocate immediately | Reduces delivery pressure |
| Far from the line | Delay until the route is clear | Avoids leaving the press idle |
| Unneeded but nearby | Collect if movement is already required | Converts free travel into progress |
Diagnose the real bottleneck
When the line slows, avoid the instinct to change everything. Count the last delay and ask where time disappeared. If the press was idle, the issue was supply or travel. If the press was active but orders failed, the issue was allocation or delivery. If movement felt chaotic, the route was probably too ambitious.
| Symptom | Likely cause | Corrective action |
|---|---|---|
| Press frequently stops | Insufficient nearby material | Shorten the refill route |
| Many rounds remain uncollected | Collection is not tied to movement | Gather during wait periods |
| Crates open but orders remain unfinished | Material and order priorities disagree | Match crates to active orders |
| Player crosses the same area repeatedly | Route lacks a stable sequence | Build a repeatable loop |
| One order consumes all attention | Queue contains low-value commitments | Finish or abandon easier distractions |
This diagnostic method prevents reaction stacking, where one small delay causes several rushed actions that create another delay. For example, if an active press stops because material is not nearby, repeatedly changing order priorities will not restore output; shortening the refill route removes the original bottleneck. A BRASS HELL survival guide should teach players to correct that cause first, then rebuild a stable production, collection, and delivery rhythm rather than merely working harder during the crisis.
BRASS HELL Tips for New Players: Safer Shift Habits
New-player survival usually depends on building a reliable routine under moderate pressure. Trying to master every shortcut at once creates inconsistency, because the player must remember the route, order priority, round collection, crate timing, and movement timing simultaneously. Instead, establish a dependable baseline and refine it one change at a time.
Learn one complete cycle
A complete cycle includes more than placing ammunition into the press: you must track the press’s reload and firing time, locate the loose rounds it produces, open at least one crate, and deliver the resulting order to the correct destination. For example, if one order takes three production cycles and the final crate adds another processing delay, that order’s true cost is the sum of those waits—not just the time spent firing. This reveals whether delays come from the press, crate handling, collection route, or delivery, making it easier to identify where your survival supplies are actually being held up.
| Learning step | What to observe | Goal |
|---|---|---|
| Feed the press | How quickly it becomes ready | Learn the basic production timing |
| Handle the output | Where loose rounds appear | Establish a collection route |
| Open one crate | How its contents affect supply | Connect crates to the line |
| Finish one order | Which materials were needed | Understand order requirements |
| Repeat the sequence | Where time was lost | Build a consistent loop |
The gameplay basics overview is useful for confirming controls and core interactions. Once those basics are automatic, return to the production loop and measure where time is actually spent rather than relying on a vague feeling that the shift is difficult.
Keep a three-level priority list
When several prompts appear, sort them by immediate danger to the production line rather than by the nearest item or the fastest route. A press warning or jam comes first because every stopped cycle blocks the line and may leave output exposed to the next processing step; for example, pause collection to refill the press before it creates a delay. If the press is stable, claim only the resources needed for a ready order, then save optional materials for safe travel windows. This order prevents a short detour from turning into a cascading production failure.
-
Priority one: Refill or repair the press before it creates a delay.
-
Priority two: Collect materials that are directly required by a ready order.
-
Priority three: Gather optional resources during safe travel windows.
This hierarchy is easy to remember because it always starts with the machine that supports the entire line: the press. A failed refill can stall every connected production step, so resolve a jam, refill, or repair prompt before diverting the route. For example, if two crates sit near the path but one is needed for an active order while the other is optional stock, claim the required crate first and leave the optional one for a safer trip. This prevents a short detour from turning into a cascading production failure and keeps the BRASS HELL line moving without unnecessary material collection.
Make fewer trips with more purpose
A trip should have a purpose before the player leaves the press. Identify the destination, identify useful objects along the route, and choose a return path that brings you close to production. Random movement often feels productive because the player is constantly busy, yet it increases distance and reduces predictability.
One-purpose trips are the safer choice. For example, if you need a crate for the press, avoid taking a long order detour until the crate is secured. If you are delivering an order, collect only the nearby rounds and supplies that fit the destination. Purpose keeps movement focused without demanding frame-perfect precision.
Build from consistency to speed
A consistent routine is faster than a chaotic routine that occasionally produces a large burst of efficiency. Players should first learn to keep the press active, then reduce wasted crate trips, and only afterward attempt risky shortcuts. This progression makes mistakes easier to diagnose because each stage has one main objective.
| Development stage | Main objective | Success signal |
|---|---|---|
| First routine | Feed the press reliably | Fewer idle periods |
| Second routine | Collect rounds during travel | Fewer forgotten items |
| Third routine | Match crates to orders | Less unnecessary opening |
| Fourth routine | Shorten the refill route | Faster recovery from delays |
| Final routine | Add selective shortcuts | Better output without instability |
These are practical BRASS HELL tips for new players because they emphasize habits that survive confusion. A strong player is not simply someone who moves quickly; it is someone who knows which small action prevents the next ten seconds from becoming a crisis.
Advanced BRASS HELL Survival Guide Scenarios
Once the basic loop is stable, survival becomes a matter of choosing the best action under changing constraints. The correct decision may differ when several orders expire, when a distant crate offers a large supply, or when players must coordinate their movement. The advanced skill is recognizing which resource represents the real cost.
Scenario: several orders expire at once
Do not attempt every order simultaneously. Identify the order that can be completed with the fewest new resources and focus on it. Once one delivery succeeds, reassess the remaining orders. This approach restores control because it converts a cluster of deadlines into a sequence of manageable decisions.
If cooperation is available, divide responsibility rather than duplicating work. One player can keep the press active while another prepares deliveries. More detailed coordination advice appears in the co-op guide, where separating production from transport can prevent two people from handling the same crate.
Scenario: a distant crate is unusually valuable
Calculate the travel cost before committing. A valuable crate is not useful if it leaves the press idle for an extended period. Choose it when the route back to production is clear, when nearby orders are already satisfied, or when another player can maintain the line during the trip.
| Distant-crate condition | Decision | Reason |
|---|---|---|
| Press is idle and no nearby supply exists | Fetch it | The crate prevents a major delay |
| Nearby orders are incomplete | Delay or coordinate | Current orders may yield faster progress |
| Another player can hold production | Assign the trip | The line stays active |
| The route includes useful loose rounds | Take it during a quiet period | Travel produces extra value |
| The crate cannot support a nearby need | Leave it for later | Its reward does not justify the interruption |
Scenario: the player must choose speed or safety
A risky shortcut is worth taking only when its failure cost is low. Moving directly across an exposed area may save a few seconds, but a failed shortcut can cost a recovery cycle and force a return trip. Compare the shortcut with the normal route by asking whether the saved time would change the next meaningful decision.
Low-risk optimization includes collecting rounds while walking, choosing crates that align with an order, and delivering nearby orders before distant ones. High-risk optimization includes ignoring the press, leaving behind nearby rounds, or accepting a distant order based only on its apparent value. The survival guide should favor the first group until the second group is consistently manageable.
Scenario: no obvious task is available
When the visible board seems empty, do not assume the shift can be relaxed. Inspect the press area, gather loose rounds, locate unopened crates, and verify the current order requirement. Empty space often means a resource has already been collected, a crate is waiting, or the next objective is not yet obvious.
A useful fallback sequence is to work from the press outward: first scan for loose rounds or an unfinished delivery, then check the machine for a refill need and inspect nearby crates one at a time. Compare the crate contents against the active order before committing labor; for example, if a crate contains the wrong item, leave it ready for a later order instead of wasting press time on unusable stock. This keeps the production loop moving while preserving resources for the next required delivery.
-
Clear any loose rounds around the press.
-
Refill the machine if necessary.
-
Inspect one nearby crate.
-
Check whether its contents match an active order.
-
Complete the simplest available delivery.
Use this fallback when the active order is temporarily unclear: sweep the press area for loose rounds, refill the machine only when its input slot is empty, and inspect nearby crates one at a time rather than converting every resource immediately. For example, if a crate contains the wrong item, leave it sealed for a later order and return to the simplest visible delivery. This prevents idle time from becoming wasted time, preserves usable stock, and creates a smooth transition back into the main production loop.
BRASS HELL Everything Guide Checklist for Consistent Survival
A complete BRASS HELL everything guide should end with a repeatable checklist rather than a long list of advanced tricks. Use the checklist before changing your routine, because small modifications work best when the cause of a delay is already clear. The goal is to reduce preventable mistakes while preserving enough flexibility for unexpected order combinations.
Pre-shift preparation
Begin by learning where the press, nearest materials, common delivery points, and easiest order destinations are. Do not memorize the entire map immediately; identify the shortest route that supports one full production cycle. Then add nearby loose-round collection points to that route so gathering supplies does not require separate errands.
| Preparation item | What to identify | Practical test |
|---|---|---|
| Press location | Nearest refill point | Can you reach it quickly? |
| Material route | Closest crate and rounds | Can you collect them during one trip? |
| Delivery route | Easiest order destination | Is it close enough for a short loop? |
| Order logic | Which requests use available materials | Can you finish one without a detour? |
| Recovery point | Safe place to regroup after a mistake | Can you return to production directly? |
During the shift
Use the same priority system every time: press, immediate order, nearby materials, then optional collection. Each press cycle should finish before you detour toward scrap farther down the factory floor. For example, if the player is forced to sprint toward a distant cash register while the press is still running, a missed handoff can trigger a belt jam; staying nearby and delivering the correct material preserves momentum. If you feel rushed, that urgency usually indicates that a lower-priority action delayed a higher-priority one, so pause collection and restore the basic production loop first.
When a mistake occurs, resist the urge to correct everything at once. Let the press run, secure the nearest required material, and restore the standard loop. Recovery speed matters because a brief recovery is less damaging than abandoning the line while chasing a distant reward.
End-of-cycle review
Review performance in concrete terms rather than with a general score. Ask how often the press stopped, how many loose rounds remained behind, and which order caused the longest route. Choose the most common issue and adjust only that part of the routine during the next cycle.
| Review question | Likely adjustment |
|---|---|
| Did the press stop often? | Shorten the material route |
| Were rounds left behind? | Add collection points to the main path |
| Were crates opened without purpose? | Match crates to active orders |
| Did one order dominate the shift? | Favor faster, better-supported orders |
| Did shortcuts create recovery time? | Use the normal route until traffic improves |
The final takeaway is straightforward: survival comes from keeping the press supported, collecting resources during natural waits, and choosing orders that match what you already have. Consistent routing and priority control make BRASS HELL survival easier because every action has a clear job, every movement has a reason, and the line keeps moving without requiring constant frantic input.
Frequently Asked Questions
How do I keep the press active in BRASS HELL?
Keep the press supplied by identifying the nearest reliable material source and using it before searching farther away. Collect loose rounds and nearby crates during the machine’s processing time, then return through the shortest practical route. The key is to prevent idle periods, not to complete optional tasks while the press waits.
Should I collect every loose round I see?
No. Collect rounds that lie beside the press, your normal route, or a required delivery. Defer distant rounds until the production line is secure. A useful BRASS HELL survival rule is to favor nearby value during movement and save optional collection for periods when the press and current order are both stable.
How should I prioritize multiple orders?
Choose the order that is nearby, mostly supported by materials you already have, and requires the fewest interruptions. Deliver it before starting a more complicated request. Accepting less orders can feel slower, but completing one cleanly often prevents several deadlines from becoming urgent at once.
Are crates worth opening immediately?
Only when their contents will support the press, an active order, or a route you already need to travel. Opening an unneeded distant crate can create a longer refill route and leave the press idle. Process nearby useful crates first, then reconsider distant ones when the current line is stable.