
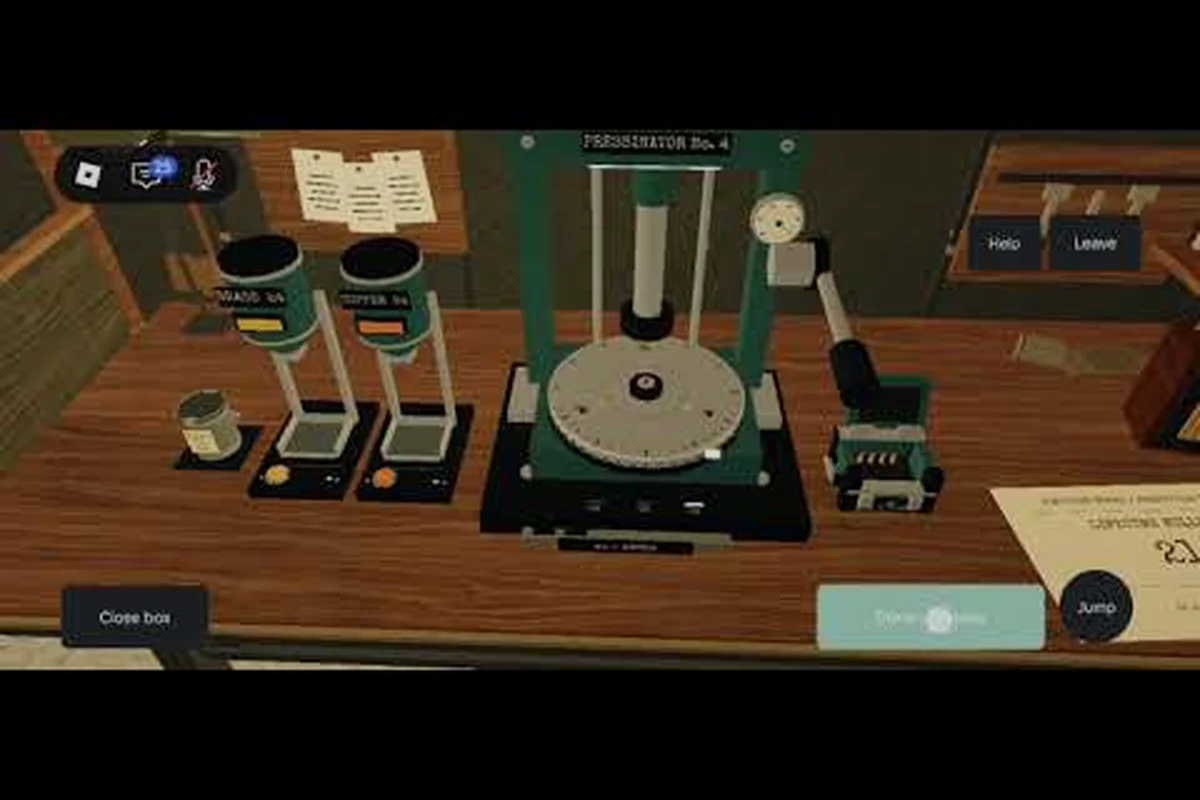
Learning BRASS HELL how to explore the factory matters because knowledge of its rooms, stations, and delivery routes turns a crowded production floor into an efficient workshop. Map every work area, trace hidden lore, and turn each crate into forward progress.
BRASS HELL How to Explore the Facility Efficiently
A useful BRASS HELL rooms guide starts with the full workflow rather than a room-by-room scramble. You move between the press, the crafting area, the warehouse, and the delivery bay, so understanding the relationship between those spaces prevents repeated walking and missed resources.
The factory is designed as a connected production system. Raw materials enter the facility, the press shapes them, workers transform the output, packed crates move toward dispatch, and finished shipments leave through a specific destination. Lore documents sit along the same route, meaning exploration and production can support each other rather than competing for time.
| Explore priority | Location | Main purpose | What to inspect |
|---|---|---|---|
| First | Press area | Produce usable components | Stations, machinery, working paths |
| Second | Crafting area | Convert materials into finished goods | Recipes, required inputs, stations |
| Third | Warehouse | Locate supplies and crates | Loose materials, sealed crates, documents |
| Fourth | Delivery bay | Complete shipments and clear output | Dispatch point, shipment requirements, route signs |
Read the production loop first
Before hunting for every visible object, trace one complete job from raw input to dispatch. Begin at the press area, identify the output you can create, then carry it toward the crafting area. After making the requested goods, visit the warehouse, pack the crates, and find the delivery bay where orders are handed off.
This method is especially useful because exploration rewards understanding rather than random movement. If you know that a station requires material from another department, you can plan a loop that collects the input and its next destination together. A concise overview of the BRASS HELL factory map can then serve as a visual checkpoint rather than a separate destination.
Separate exploration from production runs
Trying to collect every document and inspect every corner during one delivery can slow the factory down. Use two distinct habits: a working route for routine production and a sweep route for investigation. The working route should cover the shortest connection between press, crafting, storage, and dispatch; the sweep route should revisit dead ends, desks, shelves, and corner objects.
| Route type | Best time | Included stops | Primary goal |
|---|---|---|---|
| Working route | Normal orders | Press, crafting, warehouse, delivery | Maintain production and finish shipments |
| Quick sweep | Short break | Nearby desks, shelves, workshop corners | Recover supplies or discover documents |
| Full sweep | End of shift | Every accessible room and side area | Collect remaining lore and inspect the facility |
BRASS HELL Facility Layout and Room Connections
The BRASS HELL facility layout is easiest to understand as four functional zones: production, conversion, storage, and dispatch. Each zone has a clear purpose, yet the fastest path often passes through several of them. Treat the facility like a compact factory floor instead of a collection of disconnected rooms.
Production begins at the press, where components are created from the factory’s basic inputs. Crafting follows, because completed pieces often require additional processing before they can satisfy an order. Storage sits between production and delivery, giving you time to gather materials, open crates, and stage packed goods. Dispatch closes the loop by accepting the order and removing the finished shipment from your workload.
Follow materials instead of room labels
A room label tells you where you are; the material itself tells you where you need to go. Pick up a component only if it contributes to a current recipe or order, and note the station that consumes it. This prevents the common mistake of crafting something useful in isolation and then walking the entire facility later to discover that it belongs in a different chain.
| Material state | Likely location | Best next action | Route-planning question |
|---|---|---|---|
| Raw component | Press output | Carry to crafting station | Which recipe consumes it? |
| Finished product | Crafting output | Pack or stage it | Is a shipment waiting for it? |
| Packed crate | Warehouse | Take it to dispatch | Is the crate complete? |
| Unused stock | Warehouse shelves | Hold for a future order | Could it prevent a later shortage? |
When you are still learning the chain, consult the crafting guide for BRASS HELL for the relationship between presses and recipes. Treat each press as a source of material states rather than assuming every output belongs in the same workstation: match the raw component to the recipe that consumes it, then carry the finished product to the correct crafting station for packing or staging. For example, if a pressed component is listed as a recipe input, moving it directly to the next press can interrupt production; confirming the consuming station first keeps the ammunition factory layout predictable and reduces unnecessary trips between rooms.
Use landmarks to orient yourself
Landmarks should be memorable objects or machines that remain visible from multiple directions. The press, delivery signage, storage racks, and the crafting benches are stronger orientation points than small floor details. After finding a new area, stop briefly and identify the next landmark in your intended direction; this reduces backtracking more effectively than memorizing every corridor.
A practical location note can contain only four fields: the room entered, the object found, the nearest landmark, and the next destination. If you discover a document beside the warehouse racks, record “warehouse, document, racks, delivery bay.” This compact notation remains useful even when the factory floor becomes crowded with workers and crates.
BRASS HELL Ammunition Factory Layout: A Room-by-Room Route
A practical BRASS HELL ammunition factory layout follows the sequence of the press, crafting benches, warehouse crates, and delivery bay. Visit the production areas first to establish what is already available, then check storage for missing inputs. This order reduces the chance of arriving at a station with nothing to process.
Start at the press and inspect its output
The press is the factory’s anchor point. Collect the output you can make, inspect nearby containers, and note any prompts that point toward another station. The important question is not whether the press creates every product, but whether its current output can advance your next recipe or order.
Press output is the first item to place in your mental route model. If a current shipment needs a crafted product, move toward the benches. If it needs a pressed component, verify that the relevant recipe has been prepared before making additional material. This keeps production responsive instead of allowing excess stock to build up.
Inspect the crafting area for missing inputs
The crafting area is where components become order-ready goods. Check the available recipes before gathering ingredients, because each recipe determines what you should carry out of the warehouse. If a station needs two parts, verify both in your inventory rather than delivering only the more obvious component.
Recipe requirements should be checked in two directions. First, compare the requirement with your current inventory. Second, compare the recipe with the active order. This prevents you from making a valid but unnecessary item and teaches which stations have the highest value during early factory runs.
| Crafting situation | Immediate action | Better alternative |
|---|---|---|
| Recipe inputs are ready | Craft the required item | Produce only what the order needs |
| One input is missing | Find it in storage or the press | Avoid making a partial trip |
| No current order uses it | Hold the item | Gather information before investing |
| Recipe cannot be completed | Check nearby stations | Route to the missing production step |
Sweep the warehouse in a fixed pattern
The warehouse contains the greatest concentration of optional materials and hidden objects. Start along the outermost wall, move inward between the racks, and inspect crates before opening them indiscriminately. A fixed pattern prevents you from overlooking the far corner when a larger pile of supplies catches your attention.
Crate inspection should be systematic: look at the exterior, open it, compare its contents with current needs, and place useful stock near the correct production station. Do not empty every crate into one inventory pile, because separate stacks make the next recipe much easier to plan.
Finish at the delivery bay
The delivery bay is both a destination and a navigational checkpoint. Once you understand where shipments leave, you can orient the entire route: the press lies along the production side, the crafting area connects production to preparation, and the warehouse bridges preparation and dispatch.
This is also the safest place to confirm BRASS HELL where to deliver finished goods. The interaction point, shipment prompt, or dispatch marker is more reliable than relying on visual proximity. Read the required goods, compare them with your carried items, and submit only a complete order.
BRASS HELL Where to Craft and Where to Deliver
Separating “BRASS HELL where to craft” from “BRASS HELL where to deliver” prevents one of the game’s most disruptive inefficiencies: carrying finished goods through the wrong area. Crafting belongs at the designated benches, while completed orders belong at the delivery bay. The path between them passes through storage when extra inputs or documents must be collected.
Crafting decisions before gathering resources
Before leaving a crafting station, check three items: the requested output, the recipe’s required inputs, and the destination’s expected quantity. This brief audit answers whether you should craft once, craft a small batch, or stop and collect another ingredient. It also helps distinguish useful surplus from items that merely consume space or processing time.
Batch control is the practical advantage of understanding this route. If an order needs several identical units, gather the required inputs first and produce them consecutively. If two recipes share an ingredient, make the higher-priority item first, unless the second recipe supplies something needed for the first.
Delivery checklists for every completed order
The delivery process works best when you treat the bay as a checkpoint rather than a final room reached in a hurry. Confirm the order type, required goods, and quantity, then submit the package. If the order remains active, revisit the recipe chain instead of carrying another random crate to the bay.
| Checkpoint | What to verify | Common mistake |
|---|---|---|
| Before crafting | Recipe matches the active order | Making a useful but unrelated item |
| Before leaving the bench | All inputs consumed | Missing one component |
| At the warehouse | Crate contains the correct quantity | Confusing similar supplies |
| At delivery | Order prompt accepts the goods | Delivering to the wrong marker |
| After delivery | Order disappears from active list | Repeating an already completed shipment |
For the broader order structure, including shipment progression and delivery flow, use the guide to BRASS HELL mechanics. That context helps you connect the ammunition factory layout to where you craft and where to deliver: for example, tracing a required component from its recipe bench through the warehouse to the delivery bay prevents you from confusing a useful finished product with the exact ammunition or supply order currently active.
Make the Return Leg a Memorized Route
After completing a delivery, turn around and identify the next landmark rather than improvising a new route. Repeated delivery runs should become muscle memory: crafting area to warehouse, warehouse to delivery bay, then back along the same visible landmarks. This is faster than crossing the facility diagonally through disconnected aisles.
Hidden Lore and Document Exploration Route
Lore exploration works best when integrated with a production loop. Documents often sit in rooms that already have a functional purpose, so checking desks, shelves, crates, and station corners during normal errands can reveal more than a separate exhaustive search. Community experience reports consistently favor deliberate sweeps, though exact document availability may vary by version.
Search by object category
Do not look for lore only as “collectibles.” Instead, search for categories of objects that commonly contain or surround documents: desks, racks, control panels, filing cabinets, wall notices, and crates. This approach turns the facility into a sequence of searchable clusters.
| Search cluster | Locations to inspect | Why it matters |
|---|---|---|
| Work surfaces | Desks, benches, control panels | May hold notes connected to operations |
| Storage racks | Shelves, aisles, crate tops | Easy to miss behind stacked stock |
| Wall fixtures | Notices, charts, panels | Often suggest the room’s original purpose |
| Crates | Inside, beneath, beside sealed boxes | Combine progression checks with lore checks |
| Dead ends | Corners, side passages | Less traffic makes overlooked objects likely |
Use sound and visual prompts cautiously
Interactive objects may announce themselves through a prompt, outline, or brief sound, but relying on those signals alone can cause missed lore. Sweep the visible space even when nothing highlights, especially along walls and behind large foreground objects. A clean camera angle may hide a small document at the edge of the screen.
Lore consistency can also guide progress. If one document mentions production, the press or crafting area becomes a sensible next place to inspect. References to storage or shipping suggest checking the warehouse and delivery bay. Treat connections as leads, not instructions, because the documents are environmental storytelling rather than guaranteed quest markers.
Do a final reverse sweep
The final exploration pass should work backward from the delivery bay. Move through the warehouse, then the crafting area, and finish at the press. This reverse direction exposes spaces that may look less interesting when approached from the normal production side.
For a more detailed list of locations and landmarks, the BRASS HELL factory map can help you confirm whether an area has been fully checked. Keep your own checklist separate from any visual route so that every searchable cluster receives an explicit inspection.
Practical Exploration Routine for Every Shift
A reliable routine prevents lore hunting and order handling from competing for attention. Use the same sequence each time: survey the facility, fulfill current orders, collect resources, then conduct a short investigation sweep. This structure makes BRASS HELL how to explore a repeatable factory practice rather than a one-time search for collectibles.
Start with a two-minute survey
Begin near your most familiar station and check the nearest active order. Move toward the press and crafting area, note any blocked or changed stations, and return through the warehouse. The survey should answer three questions: what is ready, what is missing, and which room changed since your last visit.
| Moment | Priority | Suggested activity |
|---|---|---|
| Shift start | Current orders | Survey stations and plan required production |
| Mid-shift | Resource bottleneck | Gather only the ingredients needed next |
| After a delivery | Short investigation | Check the nearest desk, shelf, or crate cluster |
| End of shift | Full exploration | Sweep all accessible side areas and corners |
Make document checks automatic
Attach a lore check to an existing action. Whenever you open a crate, inspect the table beside it. Whenever you collect press output, glance at the control desk. Whenever you wait at the delivery bay, examine the nearby notices. These automatic checks add very little time and prevent small objects from being forgotten during a busy order.
Batch movement is another useful principle. Bring several nearby tasks into one trip: collect a needed ingredient, inspect the same room, pick up a visible document, and continue to the next station. The goal is not to rush blindly, but to avoid revisiting rooms for items you already passed.
Keep exploration notes separate from inventory
A useful exploration note identifies the exact location and what should be checked again. For example: “paper behind the east storage rack,” “lower crate near the press,” or “wall notice beside the delivery marker.” Exact language matters because “warehouse document” is much less useful than a note tied to a rack, corner, or wall fixture.
The broader BRASS HELL factory gameplay overview can help connect exploration with the day-to-day production loop. Once the route feels familiar, shorten the survey and reserve more time for the side spaces that actually contain hidden documents.
Frequently Asked Questions
What is the fastest way to explore the entire factory?
Start at the press, pass through the crafting area, sweep the warehouse aisles, and finish at the delivery bay. Inspect desks, racks, crates, control panels, and dead ends along that route. A reverse sweep afterward catches objects overlooked during normal production trips.
Where should finished ammunition and crafted goods be taken?
Take completed products to the designated delivery bay and use the order prompt there. Confirm that the shipment requires the item, the correct quantity, and the appropriate package before submitting it. Delivering an unrelated product will not advance the active order.
Should every warehouse crate be opened during exploration?
Open crates when they may contain materials, documents, or an item needed for the current order. If your notes show that the crate was already checked and contains irrelevant stock, skip it during routine runs and save full inspection for a dedicated sweep.
Can hidden lore be found outside the main rooms?
Yes, side areas, storage corners, work surfaces, and spaces behind prominent objects are worth checking. The less-trafficked parts of the ammunition factory often hold overlooked notes, ammunition crates, crafting materials, and lore, while active order objectives concentrate attention around the press and warehouse racks. For example, after inspecting the press and crafting area, check desks, notice boards, and dead ends before moving toward the delivery bay; those peripheral spots may contain resources that support the next order.
How can I remember the factory layout between sessions?
Record four landmarks: press, crafting benches, warehouse racks, and delivery bay. Learn the direct route between them, then attach smaller details such as desks, notices, and crate clusters. A simple sketch plus a list of unchecked locations makes the next exploration run much faster.